Table of Contents
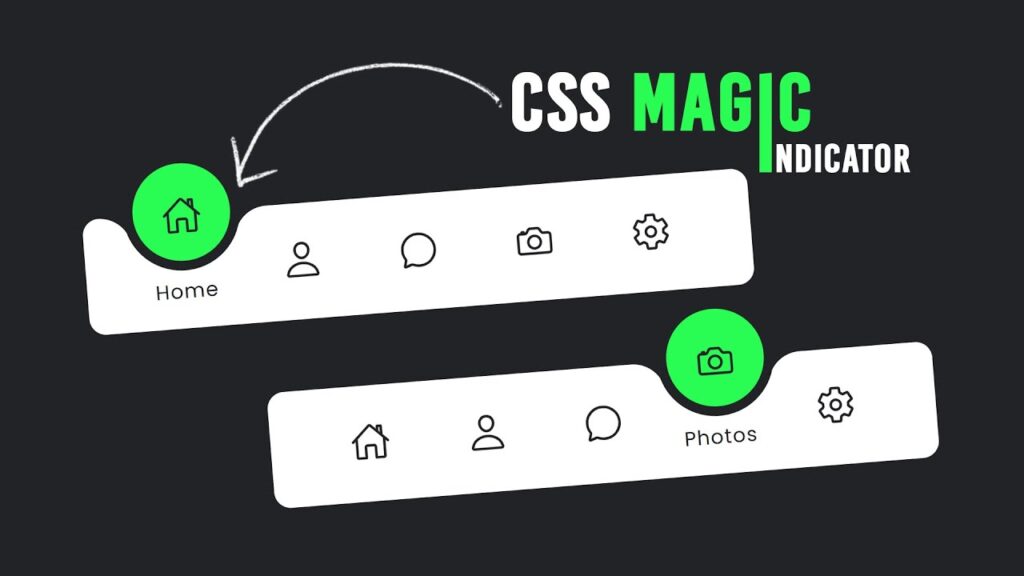
Navigation Menu Indicator using Html CSS : In modern web design, an intuitive navigation menu is essential for enhancing user experience. One way to elevate your navigation is by adding a Navigation Menu Indicator that visually indicates which menu item is active. This blog post will walk you through creating a stylish navigation menu with an indicator using HTML, CSS, and JavaScript.
What is a Navigation Menu Indicator?
A Navigation Menu Indicator is a visual cue that shows users which section of your website they are currently viewing. It enhances the usability of the navigation by providing immediate feedback, making the browsing experience smoother and more enjoyable.
Implementation Steps
1. HTML Structure
We’ll start with a simple HTML structure for our navigation menu. The following code snippet sets up a navigation bar with several menu items:
<html>
<head>
    <title>Magic Menu Indicator | TechyTechs</title>
    <link rel="stylesheet" type="text/css" href="style.css">
</head>
<body>
    <div class="navigation">
        <ul>
            <li class="list active">
                <a href="#">
                    <span class="icon">
                        <ion-icon name="home-outline"></ion-icon>
                    </span>
                </a>
            </li>
            <li class="list">
                <a href="#">
                    <span class="icon">
                        <ion-icon name="person-outline"></ion-icon>
                    </span>
                </a>
            </li>
            <li class="list">
                <a href="#">
                    <span class="icon">
                        <ion-icon name="chatbubble-outline"></ion-icon>
                    </span>
                </a>
            </li>
            <li class="list">
                <a href="#">
                    <span class="icon">
                        <ion-icon name="camera-outline"></ion-icon>
                    </span>
                </a>
            </li>
            <li class="list">
                <a href="#">
                    <span class="icon">
                        <ion-icon name="settings-outline"></ion-icon>
                    </span>
                </a>
            </li>
            <div class="indicator"><span></span></div>
        </ul>
    </div>

    <script type="module" src="https://unpkg.com/ionicons@5.5.2/dist/ionicons/ionicons.esm.js"></script>
    <script nomodule src="https://unpkg.com/ionicons@5.5.2/dist/ionicons/ionicons.js"></script>
    <script src="script.js"></script>
</body>
</html>
2. CSS Styles
Next, we’ll define the styles to make our navigation look appealing. The following CSS styles will create a clean and modern design for our navigation menu.
@import url('https://fonts.googleapis.com/css?family=Poppins:100,200,300,400,500,600,700,800,900');

* {
    margin: 0;
    padding: 0;
    box-sizing: border-box;
    font-family: 'Poppins', sans-serif;
}

:root {
    --clr: #fff;
}

body {
    display: flex;
    justify-content: center;
    align-items: center;
    background: var(--clr);
    min-height: 100vh;
}

.navigation {
    width: 420px;
    height: 70px;
    background: #209cff;
    position: relative;
    display: flex;
    justify-content: center;
    z-index: 1;
    box-shadow: 0 5px 15px rgba(0, 0, 0, 0.1);
    border-radius: 10px;
}

.navigation ul {
    display: flex;
    width: 350px;
}

.navigation ul li {
    position: relative;
    list-style: none;
    width: 70px;
    height: 70px;
    z-index: 1;
}

.navigation ul li a {
    position: relative;
    display: flex;
    justify-content: center;
    align-items: center;
    flex-direction: column;
    width: 100%;
    text-align: center;
    font-weight: 500;
}

.navigation ul li a .icon {
    position: relative;
    display: block;
    line-height: 75px;
    font-size: 1.5em;
    text-align: center;
    transition: 0.5s;
    color: #fff;
    opacity: 0.75;
}

.navigation ul li.active a .icon {
    transform: translateY(-8px);
    opacity: 1;
    color: #209cff;
}

.indicator {
    position: absolute;
    top: -10px;
    width: 70px;
    height: 70px;
    border-bottom-left-radius: 35px;
    border-bottom-right-radius: 35px;
    border: 6px solid var(--clr);
    background: var(--clr);
    cursor: pointer;
    transition: 0.5s;
}

.indicator::before {
    content: '';
    position: absolute;
    top: 4px;
    left: -25.75px;
    width: 20px;
    height: 20px;
    border-top-right-radius: 20px;
    box-shadow: 4px -6px 0 2px var(--clr);
}

.indicator::after {
    content: '';
    position: absolute;
    top: 4px;
    right: -25.75px;
    width: 20px;
    height: 20px;
    border-top-left-radius: 20px;
    box-shadow: -4px -6px 0 2px var(--clr);
    z-index: -1;
}

.navigation ul li:nth-child(2).active ~ .indicator {
    transform: translateX(calc(70px * 1));
}

.navigation ul li:nth-child(3).active ~ .indicator {
    transform: translateX(calc(70px * 2));
}

.navigation ul li:nth-child(4).active ~ .indicator {
    transform: translateX(calc(70px * 3));
}

.navigation ul li:nth-child(5).active ~ .indicator {
    transform: translateX(calc(70px * 4));
}

.indicator span {
    position: absolute;
    bottom: 3px;
    left: -1px;
    width: 60px;
    height: 60px;
    border: 4px solid #209cff;
    background: #fff;
    border-radius: 50%;
    transform-origin: bottom;
    box-shadow: 0 5px 15px rgba(0, 0, 0, 0.15);
    transform: scale(0.85);
}
3. JavaScript Functionality
Finally, we’ll create a separate JavaScript file to handle the active link functionality. This script will ensure that when a user clicks on a menu item, the indicator moves to that item.
// script.js
const list = document.querySelectorAll('.list');

function activelink() {
    list.forEach((item) => item.classList.remove('active'));
    this.classList.add('active');
}

list.forEach((item) => item.addEventListener('click', activelink));
Conclusion
By following these steps, you’ve created a Navigation Menu Indicator using HTML, CSS, and JavaScript. This stylish indicator not only improves navigation but also enhances the overall user experience. Customize the colors and icons to match your website’s theme for a cohesive look.
Ready to implement the Navigation Menu Indicator on your own site? Download the complete code and files to get started!
Feel free to share your thoughts or any modifications you make in the comments below! Happy coding!


